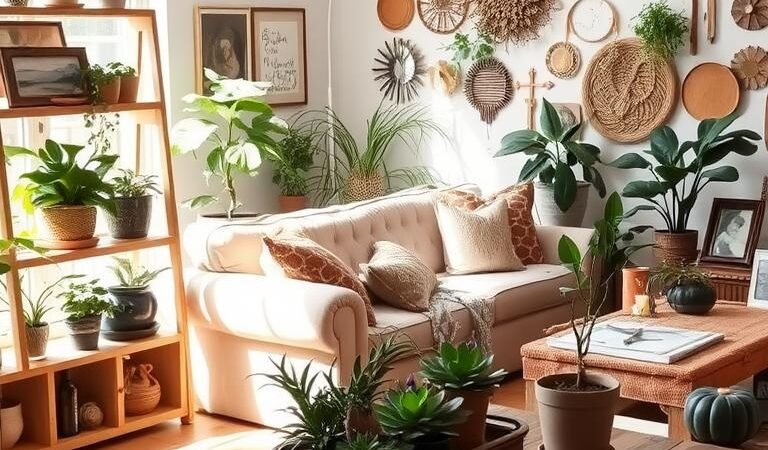
Creating a stylish and inviting living space doesn’t have to break the bank. With a little creativity and effort, budget-friendly DIY projects can completely transform your surroundings. These ideas not only save money but also allow you to infuse your personality into every corner of your home.
Repurposing materials and finding hidden gems at thrift stores can lead to unique and meaningful decor. From tactile textures to aromatic elements, these projects engage the senses, making your space feel more alive. Whether you’re looking to refresh a room or adapt to the changing seasons, these ideas are versatile and practical.
By combining affordability with creativity, you can achieve a cohesive and personalized look. Start with a vision board to plan your design, ensuring every piece works harmoniously. The result? A space that feels uniquely yours, without stretching your wallet.
Table of Contents
Key Takeaways
- Budget-friendly DIY projects save money while enhancing your space.
- Repurposed materials and thrift store finds add unique charm.
- Sensory elements like textures and scents elevate the ambiance.
- Vision boards help create a cohesive and personalized design.
- Projects are adaptable to seasonal changes and personal preferences.
Introduction: Why DIY Home Decor is the Perfect Budget-Friendly Solution
Crafting a unique and stylish space can be both affordable and rewarding. With DIY home decor, you can make space truly your own without overspending. This approach not only saves money but also allows you to express your creativity and personality.
Many renters, about 35%, avoid permanent changes to their living spaces. Temporary solutions like Command hooks or tea towel curtains offer flexibility. These ideas ensure your decor can evolve with your needs.

Creating a vision board helps you plan your design cohesively. It’s a great way to visualize your style and ensure every piece works harmoniously. This process can also be therapeutic, offering a sense of accomplishment and relaxation.
Here’s a quick comparison of costs between professional decor and DIY solutions:
| Project | Professional Cost | DIY Cost |
|---|---|---|
| Apothecary Cabinet | $150 | $15 |
| Curtains | $100 | $20 |
| Wall Art | $200 | $30 |
Designer secrets, like hanging curtain rods higher, can make a room feel larger and more elegant. Using premium paints like Farrow & Ball adds a touch of luxury without the high price tag. These small changes can have a big impact.
Personalized spaces also offer psychological benefits. Surrounding yourself with items you’ve created fosters a sense of pride and comfort. It’s a way to make your home truly yours, reflecting your unique taste and personality.
1. Stencil Your Pillows for a Fresh, Custom Look
Transform your throw pillows into custom masterpieces with simple stenciling techniques. This project allows you to add a personal touch to your fabric decor, creating designs that reflect your unique style. Whether you’re upcycling old pillows or starting with plain covers, stenciling is an affordable and creative solution.

Nathan Kirkman’s stencil technique is a great starting point. Using blue upholstery spray paint and painter’s tape, you can achieve professional-looking results. The key is to secure the stencil properly to prevent bleed-through and ensure crisp lines.
Materials Needed
- Fabric paint (spray, acrylic, or textile markers)
- Stencil (geometric or botanical patterns)
- Painter’s tape
- Throw pillows or plain pillow covers
- Rubbing alcohol solution (for fixing mistakes)
Step-by-Step Instructions
- Choose your stencil design and secure it to the pillow with painter’s tape.
- Apply fabric paint evenly, using light layers for a clean finish.
- Allow the paint to cure according to the fabric type (typically 24 hours).
- Remove the stencil carefully and touch up any imperfections with a small brush.
- For an ombre effect, layer stencils with varying paint intensities.
Here’s a quick comparison of fabric paint types to help you decide:
| Paint Type | Best For | Curing Time |
|---|---|---|
| Spray Paint | Large, bold designs | 24 hours |
| Acrylic Paint | Detailed patterns | 24-48 hours |
| Textile Markers | Small, intricate designs | 12-24 hours |
This DIY approach not only saves money but also lets you experiment with colors and patterns. Whether you’re a beginner or a seasoned crafter, stenciling pillows is a fun and rewarding way to refresh your space.
2. Tie-Dye Curtains for a Boho Vibe
Add a bohemian flair to your space with tie-dye curtains that bring vibrant energy. This DIY project lets you infuse your fabric with unique patterns and colors, creating a one-of-a-kind look. Whether you’re aiming for subtle gradients or bold designs, tie-dye offers endless possibilities.

How to Create a Shibori Pattern
Shibori, a traditional Japanese dyeing technique, adds intricate patterns to your curtains. Carson Downing’s indigo dye process is a great starting point. Begin by folding the fabric and securing it with rubber bands or blocks. This creates resist areas that result in stunning geometric or organic designs.
Here’s a quick guide to Shibori folding:
- Fold the fabric accordion-style for straight lines.
- Use wooden blocks for circular patterns.
- Experiment with multiple folds for complex designs.
Tips for Perfect Dyeing
Choosing the right dye is crucial for achieving vibrant color. Natural dyes like indigo offer rich, earthy tones, while synthetic dyes provide brighter hues. For gradient effects, vary the dip duration—longer dips create deeper shades.
Here’s a comparison of dye types:
| Dye Type | Best For | Color Intensity |
|---|---|---|
| Natural Dye | Earthy, muted tones | Medium |
| Synthetic Dye | Bright, bold colors | High |
After dyeing, rinse the fabric thoroughly to remove excess dye. Use cold water to prevent bleeding. Hang the curtains to dry in a shaded area to avoid sun-fading. For a polished finish, pair them with curtain rings that match your rod style.
3. Create a Mosaic Tile Vase for a Pop of Color
Bring vibrant energy to your room with a mosaic tile vase that combines creativity and functionality. This DIY project allows you to transform a simple glass container into a stunning piece of art. Whether you’re upcycling broken dishware or using new tiles, the result is a unique addition to your decor ideas.

Choosing the Right Glass Container
Start with a cylindrical glass vase for the best results. The smooth surface ensures tiles adhere evenly, and the shape allows for balanced designs. Clear glass works well for showcasing the mosaic pattern, while colored glass can add depth to your project.
Attaching the Tiles
Jason Donnelly’s mosaic method is a great guide for beginners. Apply clear adhesive in small sections to prevent drying out. Place tiles carefully, ensuring they fit snugly together. For asymmetrical designs, plan the layout beforehand to maintain balance.
Here are some additional tips to enhance your mosaic vase:
- Use safety gloves when cutting glass tiles to avoid injuries.
- Select grout colors that complement or contrast with your tiles for added visual interest.
- Waterproof the vase with a sealant if you plan to use it for flowers or plants.
For more inspiration on using mosaics in interior design, check out these creative ideas.
4. Frame Peel-and-Stick Wallpaper for Budget-Friendly Art
Elevate your walls with peel-and-stick wallpaper framed as art. This DIY project is a creative way to add personality to your space without breaking the bank. By framing wallpaper, you can achieve a high-end look with minimal effort and cost.

Selecting the Perfect Pattern
Choosing the right wallpaper pattern is key to creating a cohesive design. Scale the pattern to fit your frame proportions for a balanced look. Mixing multiple wallpaper samples can add depth and visual interest to your gallery wall.
Consider the room’s color scheme and style when selecting patterns. Bold geometric designs work well in modern spaces, while floral or textured patterns suit traditional interiors. Non-permanent adhesive options make it easy to switch designs as your taste evolves.
How to Apply Wallpaper to a Frame
Adam Albright’s framing technique simplifies the process. Start by cutting the wallpaper to fit the frame’s backing. Use foam core as an alternative material for lightweight and durable support. Secure the wallpaper with adhesive, smoothing out any bubbles for a polished finish.
For a 3D shadow box effect, layer the wallpaper slightly raised from the backing. This adds dimension and makes the art piece stand out. Protect your creation from UV fading by using UV-resistant glass or placing it away from direct sunlight.
Here are some additional tips for framing wallpaper:
- Use metallic foil accents for a touch of glamour.
- Experiment with gallery wall arrangements for a curated look.
- Install wall anchors for heavier frames to ensure stability.
This budget-friendly approach allows you to create custom art that reflects your unique style. Whether you’re decorating a living room or adding flair to a hallway, framed wallpaper is a versatile and impactful solution.
5. Sculptural Taper Candles for Unique Tabletop Decor
Elevate your tabletop with sculptural taper candles that blend artistry and ambiance. This DIY project allows you to create custom candles that double as stunning centerpieces. By softening and shaping wax, you can craft unique forms that reflect your personal design aesthetic.

Softening and Shaping Candles
Carson Downing’s water softening method is a simple yet effective technique. Heat water to 100°F in a Mason jar, ensuring safety by using heat-resistant gloves. Submerge the candle for a few seconds to soften the wax without melting it completely. This process allows for easy shaping and twisting.
When choosing wax, consider the flexibility of beeswax versus paraffin. Beeswax is more pliable, making it ideal for organic forms, while paraffin holds sharper geometric shapes better. Experiment with both to achieve your desired look.
Creative Twisting Techniques
Twisting candles adds a dynamic element to your decor. Start by softening the wax, then gently twist the candle into spirals, waves, or loops. For a polished finish, smooth out any imperfections with your fingers or a soft cloth.
Here’s a quick guide to enhancing your sculptural candles:
- Control dye penetration by layering colors for a gradient effect.
- Infuse scents like lavender or vanilla for an aromatic touch.
- Group candles in varying heights and shapes for visual impact.
- Pair with vintage candle holders to complement the design.
For inspiration, consider these candle types and their characteristics:
| Wax Type | Best For | Flexibility |
|---|---|---|
| Beeswax | Organic forms | High |
| Paraffin | Geometric shapes | Medium |
This project is a creative way to add personality to your space. Whether you’re hosting a dinner party or simply refreshing your decor, sculptural taper candles are a versatile and impactful solution.
6. Marble-Patterned Tray for a Luxe Look
Add a touch of luxury to your space with a marble-patterned tray that’s both functional and stylish. This DIY project transforms a simple wooden base into a high-end decor piece. Perfect for organizing small items or serving as a chic centerpiece, it’s a versatile addition to any room.

Using Self-Adhesive Marble Paper
Carson Downing’s marble paper application method makes this project easy and accessible. Start with a wooden cutting board as the base for durability and a clean surface. Choose a self-adhesive marble paper that complements your decor ideas—options range from classic white to bold black veining.
Here’s how to apply the paper for a seamless finish:
- Measure and cut the paper to fit the tray’s surface, leaving a slight overlap for edge wrapping.
- Peel the backing slowly, smoothing the paper to avoid air bubbles.
- Use a craft knife to trim excess paper for clean edges.
Adding Leather Handles
Leather handles elevate the tray’s look, adding both functionality and sophistication. Choose straps that match your kitchen hardware or contrast for a bold statement. Attach them securely using small screws or adhesive, ensuring they’re comfortable to grip.
Consider these tips for handle ergonomics:
- Opt for soft, durable leather to prevent wear over time.
- Test the weight capacity to ensure the tray can hold items like books or dishes.
- Add a faux patina to the leather for a vintage touch.
For a polished finish, seal the tray with a food-safe varnish. This protects the surface and ensures it’s safe for everyday use. Whether you’re displaying it on a coffee table or using it in the kitchen, this marble-patterned tray is a budget-friendly way to add elegance to your home.
7. Cozy Planter Makeover with Cotton Piping Cord
Give your planters a cozy upgrade with cotton piping cord for a textured, stylish look. This DIY project transforms ordinary containers into unique pieces that blend functionality and charm. Whether you’re working with terracotta or plastic, the process is simple yet impactful.

Wrapping and Securing the Cord
Nicolas Gourguechon’s cord wrapping technique is a great starting point. Begin by applying a small amount of hot glue to the planter’s base. Wrap the cotton piping cord tightly, ensuring each loop sits snugly against the previous one. Use a low-temperature setting on your glue gun to avoid melting the cord or damaging the planter.
Here are some tips for a flawless finish:
- Calculate the cord yardage needed based on the planter’s size to avoid running short.
- Experiment with nautical or boho patterns for added visual interest.
- Weatherproof the cord with a sealant if the planter will be used outdoors.
Choosing the Right Planter
Selecting the right base is crucial for this project. Terracotta planters offer a natural, rustic look, while plastic bases are lightweight and easy to handle. Consider the following factors when choosing:
- Terracotta is porous, allowing for better drainage but may require sealing.
- Plastic is durable and versatile, ideal for indoor or outdoor use.
- Ensure the planter has drainage holes to prevent waterlogging.
For a cohesive decor theme, coordinate the planter’s color and style with your plant choices. Test the cord’s colorfastness to ensure it won’t fade over time. Repair any frayed ends by trimming and securing them with a dab of glue.
This DIY makeover is a creative way to add personality to your space. Whether you’re refreshing old planters or starting from scratch, cotton piping cord offers endless possibilities for customization.
8. DIY Oilcloth Table Runner for Easy Cleanup
Enhance your dining experience with a custom oilcloth table runner that’s both practical and stylish. This DIY project is perfect for adding a splash of color to your kitchen while ensuring easy cleanup. Oilcloth, a durable and water-resistant fabric, makes it ideal for busy households or festive gatherings.

Sewing Basics for Beginners
Jay Wilde’s 30-minute sewing method simplifies this project for beginners. Start by measuring your table and cutting the oilcloth to size. Use a rotary cutter for clean edges and a straightedge ruler for precision. If sewing isn’t your forte, fusible webbing offers a no-sew alternative for securing seams.
Here’s a quick comparison of oilcloth and vinyl to help you choose:
- Oilcloth: Natural cotton base, biodegradable, and slightly softer texture.
- Vinyl: Synthetic material, highly durable, and available in bold patterns.
Adding Decorative Trim
Decorative trim elevates your table runner’s design. Bias tape is a popular choice for finishing edges, offering both durability and a polished look. For a festive touch, consider holiday-themed patterns or metallic accents. Secure the trim with fabric glue or a simple stitch for a seamless finish.
Here are some tips for customizing your runner:
- Test stain resistance by applying common spills like coffee or wine.
- Add a heat-resistant lining for added protection against hot dishes.
- Create coordinating placemat sets for a cohesive table setting.
- Use non-slip backing to keep the runner in place during meals.
This DIY oilcloth table runner is a versatile addition to your decor. Whether you’re hosting a dinner party or sprucing up your everyday dining space, it’s a practical and stylish solution.
9. Botanical Throw Pillow Using Tropical Leaves
Bring the lush beauty of the tropics into your home with a botanical throw pillow. This DIY project lets you create a unique piece of fabric decor that’s both stylish and nature-inspired. Using tropical leaves as stamps, you can design a pillow that adds a fresh, organic touch to your space.

Preparing the Leaf Stamp
Nicolas Gourguechon’s leaf stamping technique is a great way to start. Begin by selecting fresh or preserved palm fronds. Fresh leaves offer vibrant textures, while preserved ones ensure consistency. Use a fabric medium additive to enhance the paint’s adhesion and prevent fading.
Here’s how to prepare your leaf stamp:
- Clean the leaf surface to remove dirt or debris.
- Apply fabric paint evenly using a brush or sponge.
- Experiment with multi-color layering for a gradient effect.
Setting the Design with Ironing
Once the stamp is applied, set the design using a cold water setting process. This ensures the paint adheres properly without distorting the image. Iron the fabric on a low heat setting to lock in the design and prevent fading over time.
Consider these tips for a polished finish:
- Use a pressing cloth to protect the fabric from direct heat.
- Test the design on a scrap piece of fabric before applying it to the pillow.
- Add 3D embroidery enhancements for a textured look.
This project is a creative way to add personality to your space. Whether you’re coordinating with wallpaper or creating a standalone piece, a botanical throw pillow is a versatile and impactful addition to your decor.
10. Rope Trivet for a Rustic Touch
Add a rustic charm to your kitchen with a handmade rope trivet that’s both functional and stylish. This DIY project lets you create a heat-resistant surface for hot pots and pans while adding a touch of natural elegance to your decor. Using natural fibers like jute, hemp, or cotton, you can craft a trivet that’s as durable as it is beautiful.

Weaving Techniques
Jacob Fox recommends using natural fibers for their durability and eco-friendly appeal. Start by selecting your preferred material—jute for a coarse texture, hemp for strength, or cotton for a softer finish. Begin weaving in a circular or hexagonal pattern, depending on your desired shape. Use a glue gun to secure the starting point, ensuring the weave stays tight and even.
Here’s a quick comparison of natural fibers:
| Fiber | Best For | Texture |
|---|---|---|
| Jute | Rustic, coarse designs | Rough |
| Hemp | Durable, heavy-duty trivets | Firm |
| Cotton | Soft, elegant finishes | Smooth |
Securing the Ends
Once your trivet is woven, secure the ends with a dab of hot glue. For added durability, apply a food-safe sealant to protect the fibers from heat and moisture. If you’re feeling creative, incorporate glass beads into the design for a decorative touch. Test the trivet’s heat distribution by placing a hot pan on it to ensure it performs as expected.
Here are some additional tips for a polished finish:
- Use a low-temperature glue gun to avoid burning the fibers.
- Experiment with custom sizing to fit your table or counter space.
- Consider converting the trivet into hanging wall art for a dual-purpose decor piece.
This project is a simple yet impactful way to add personality to your kitchen. Whether you’re hosting a dinner party or sprucing up your everyday space, a rope trivet is a practical and stylish solution.
11. Painted Stair Risers for a Bold Statement
Make a bold statement in your home with painted stair risers that combine creativity and functionality. This DIY project transforms an often-overlooked area into a focal point, adding personality and charm to your space. Whether you prefer subtle patterns or vibrant designs, painted risers can elevate your decor effortlessly.

Taping Off the Steps
Jay Wilde’s taping technique ensures clean, professional results. Start by cleaning the risers thoroughly to remove dirt and debris. Use painter’s tape to mask off the treads and edges, ensuring sharp lines. For intricate patterns, consider using stencils or masking tape to create geometric designs.
Here are some tips for effective taping:
- Use high-quality painter’s tape to prevent bleed-through.
- Press the tape firmly to ensure it adheres properly.
- Remove the tape carefully while the paint is still slightly wet for clean edges.
Choosing the Right Paint
Selecting the right paint is crucial for durability and aesthetics. High-traffic areas require paint that can withstand wear and tear. Sample pots are a great way to test colors before committing. Consider non-slip additives for safety, especially in busy households.
Here’s a comparison of paint types for stair risers:
| Paint Type | Best For | Durability |
|---|---|---|
| Latex Paint | Indoor use, easy cleanup | High |
| Oil-Based Paint | High-traffic areas, smooth finish | Very High |
| Chalk Paint | Vintage or distressed looks | Medium |
For historic homes, match the paint to the original color scheme to maintain authenticity. Lighting can also impact the final look, so test the color in different conditions. Regular touch-ups will keep your risers looking fresh and vibrant.
This project not only enhances your decor but can also increase your home’s resale value. Whether you’re aiming for a modern or traditional look, painted stair risers are a versatile and impactful solution.
12. DIY Floating Shelf for Instant Storage and Display
Maximize your wall space with a floating shelf that blends storage and style effortlessly. This project transforms basic materials into a functional display area for books, plants, or treasured items. The combination of wood and rope creates visual warmth while maintaining structural integrity.
Using a Wood Cutting Board
Nicolas Gourguechon’s cutting board method simplifies shelf construction. Start with an unfinished bamboo or acacia board for its natural durability. These materials resist warping while offering attractive grain patterns that enhance your decor.
Consider these finishing options based on your style:
- Staining: Enhances natural wood tones; use pre-stain conditioner for even absorption
- Painting: Creates bold contrast; sand lightly between coats for smoothness
- Natural finish: Food-grade mineral oil highlights raw texture
For hidden bracket alternatives, install D-ring hardware on the board’s underside. Position them 1/3 from each edge for optimal weight distribution. Test different arrangements with painter’s tape before permanent installation.

Hanging the Shelf with Rope
Natural fiber ropes like manila or hemp provide both strength and rustic charm. For earthquake-proofing, use double fisherman’s knots at connection points. These knots tighten under pressure, preventing slippage during movement.
Follow this leveling technique for perfect alignment:
- Mark desired height on wall with pencil
- Use laser level to extend guideline across space
- Pre-drill anchor holes slightly smaller than rope diameter
- Thread ropes through ceiling hooks or wall anchors
For lighting integration, consider these options:
| Style | Installation | Best For |
|---|---|---|
| LED strips | Under-shelf mounting | Ambient glow |
| Plug-in sconces | Rope-wrapped cords | Task lighting |
Display styling strategies include grouping items in odd numbers for visual balance. Leave 30% negative space to prevent clutter. This diy solution proves functional storage can be equally decorative when executed thoughtfully.
Bonus Tips for Budget-Friendly DIY Home Decor
Discover clever ways to elevate your space without overspending. Whether you’re a seasoned crafter or a beginner, these tips will help you create stunning decor while staying within your budget. From sourcing affordable materials to repurposing old items, there’s something for everyone.
Where to Find Affordable Materials
Finding the right materials doesn’t have to be expensive. Here are some cost-effective options to consider:
- Habitat for Humanity Restore: A treasure trove of gently used furniture, fixtures, and building materials at discounted prices.
- Facebook Marketplace: A great platform to find vintage pieces and affordable decor items from local sellers.
- Dollar Stores: Stock up on basic supplies like paint, brushes, and small containers for organizing.
- Library Tool Rental Programs: Borrow tools like drills or sanders for free or at a low cost.

How to Repurpose Old Items
Turn unused or outdated items into something fresh and functional. Here are some creative ideas to get you started:
- Cabinet Knob Upcycling: Replace old knobs with unique finds from salvage yards for an instant upgrade.
- Wine Cork Repurposing: Use corks to create coasters, trivets, or even a bulletin board.
- Picture Frame Conversions: Turn old frames into trays, mirrors, or wall organizers.
- Community Swap Events: Trade items you no longer need for something new-to-you.
By exploring these options, you can create a personalized space that reflects your style without stretching your wallet. Remember, the best DIY projects are those that combine creativity with practicality.
How to Stay Organized During Your DIY Projects
Staying organized during your creative endeavors can make all the difference in achieving a polished result. A structured approach not only saves time but also ensures your project runs smoothly from start to finish. Whether you’re tackling a small craft or a larger renovation, these tips will help you maintain order and focus.
Creating a Project Timeline
Start by mapping out a clear timeline for your DIY tasks. Break the project into smaller, manageable steps and assign deadlines to each. Use digital planning apps like Trello or Asana to track progress and set reminders. This approach keeps you on track and prevents last-minute rushes.
For material-heavy projects, consider a pegboard system to organize tools and supplies. Labeling containers and using mobile workstations can also streamline your workflow. A well-planned timeline ensures you have everything you need when you need it.
Keeping Your Workspace Tidy
A clean workspace is essential for efficiency and safety. Implement dust containment solutions like plastic sheeting or vacuum attachments to minimize mess. Store materials in labeled bins or drawers for easy access. Regularly sort waste into recycling, compost, and trash to maintain order.
Inspiration boards can also help keep your ideas organized. Pin sketches, color swatches, and material samples to visualize the final outcome. This not only keeps your space tidy but also fuels creativity throughout the process.
By combining a clear timeline with a tidy workspace, you can tackle any DIY project with confidence and ease. These strategies ensure your creative process is as enjoyable as the final result.
Conclusion: Transform Your Space with These Easy DIY Home Decor Projects
Revamping your surroundings with creative touches doesn’t require a hefty investment. These projects offer a chance to make space uniquely yours while staying within a budget. From seasonal refreshes to skill-building pathways, each idea encourages personal expression and practical solutions.
Share your transformations with the community or gift your creations to loved ones. Regular maintenance ensures your diy home decor remains fresh and vibrant. Capture your work with thoughtful photography to inspire others and celebrate your progress.
Whether you’re a beginner or a seasoned crafter, these ideas are designed to spark creativity and bring joy to your everyday life. Start small, experiment often, and watch your space evolve into a reflection of your unique style.