Small changes can make a big difference in any room. Whether you’re a homeowner or renter, strategic upgrades can elevate your space without breaking the bank. This guide explores 16 ideas that combine style and functionality, offering cost-effective solutions for every design enthusiast.
From peel-and-stick wallpaper to cohesive hardware finishes, these ideas focus on high-ROI improvements. Real-world examples from renovation projects showcase how simple updates can create a sensory-rich transformation. Discover how to achieve accessible luxury through thoughtful material choices and expert tips.
This article is your go-to resource for creating a space that feels fresh, modern, and uniquely yours. Let’s dive into the possibilities and inspire your next project.
Table of Contents
Key Takeaways
- Affordable upgrades can transform any room with style and functionality.
- Explore 16 cost-effective ideas for homeowners and renters alike.
- Real-world examples highlight the impact of small changes.
- Focus on high-ROI improvements that enhance your space.
- Use peel-and-stick wallpaper and cohesive finishes for a polished look.
1. Refresh Your Bathroom with a Fresh Coat of Paint
A fresh coat of paint can breathe new life into any space. It’s one of the most cost-effective ways to transform the look and feel of a room. Whether you’re aiming for a bold statement or a subtle refresh, the right color and technique can make all the difference.

Choosing the Right Color
Color plays a significant role in shaping the ambiance of a room. Cool tones like blues and greens create a calming effect, perfect for small spaces. Warm tones, such as yellows and oranges, add energy and warmth. For a bold look, consider Sherwin Williams Studio Blue Green, which adds depth and sophistication.
Before committing, test sample pots on multiple walls. Observe how the color changes with natural and artificial light. This step ensures you’ll love the final result.
Painting Techniques for a Professional Finish
For a polished look, proper preparation is key. Start by cleaning the walls and sanding glossy surfaces to ensure the paint adheres well. Use moisture-resistant eggshell or satin finishes for durability in humid areas.
Master the tape-free cutting-in technique with an angled brush for clean edges. If you’re feeling creative, try a two-tone treatment using painter’s tape to add architectural interest. Pair painted walls with metallic accessories for a cohesive, modern look.
Avoid common mistakes like roller stipple by using high-quality tools and applying even pressure. With these tips, you’ll achieve a professional finish that elevates your space.
2. Update Your Vanity for a Modern Look
Transform your space by focusing on a key element—the vanity. This central piece can set the tone for the entire room. Whether you’re aiming for a sleek, modern look or a cozy, traditional vibe, updating your vanity is a game-changer.

Repainting vs. Replacing Your Vanity
When updating your vanity, you have two main options: repainting or replacing. Repainting is a cost-effective choice, often costing around $50 for materials. It’s ideal for cabinets in good condition but needing a fresh style.
Replacement, on the other hand, can cost $800 or more. This option is better for damaged or outdated vanities. For example, a Restore find like a $60 vanity top can be polished to look brand new. Always assess the condition of your current vanity before deciding.
| Option | Cost | Best For |
|---|---|---|
| Repainting | $50 | Good condition cabinets needing a refresh |
| Replacing | $800+ | Damaged or outdated vanities |
Budget-Friendly Vanity Options
For those on a tight budget, there are plenty of creative solutions. IKEA hacks using stock cabinets with custom fronts are a popular choice. Another option is to update the hardware—chrome fixtures can instantly modernize your vanity.
If you’re feeling adventurous, try a bold color like green with yellow accents. This approach can turn your vanity into a focal point. Floating vanities are also a great option for small spaces, offering a sleek and functional look.
Essential tools for a DIY project include sandpaper, primer, and high-quality paint. Avoid painting over water-damaged MDF, as it won’t hold up well. Coordinate your sink faucet finishes for a cohesive design.
3. Transform Your Shower with New Fixtures
Revamping your shower can instantly elevate your daily routine. New fixtures not only enhance functionality but also add a touch of modern elegance. Whether you’re looking for a quick refresh or a complete overhaul, there are plenty of ways to achieve a stylish and efficient shower space.

Affordable Showerhead Upgrades
One of the simplest upgrade options is replacing your showerhead. Rain-style models from home centers offer a luxurious experience without breaking the bank. Compare flow rates—1.5GPM heads save water, while 2.5GPM models provide a stronger flow.
WaterSense-certified models are an excellent choice for eco-conscious homeowners. These fixtures reduce water usage while maintaining performance. Luxury hotel-style rainfall heads are available for under $75, making them an accessible option for any budget.
Adding a Handheld Sprayer for Convenience
A handheld sprayer is a versatile addition to any shower. It’s perfect for cleaning, pet bathing, and improving accessibility. Installation is straightforward and can be completed in just 15 minutes with basic tools.
Choose a diverter valve system that suits your needs. Single-valve diverters are simple, while dual-valve systems offer more control. Pair your sprayer with a coordinating shower curtain rod for a cohesive look.
Regular maintenance is key to keeping your fixtures in top condition. Clean clogged nozzles with vinegar to prevent hard water buildup. Chrome finishes are stylish but require extra care to avoid spotting.
4. Create a Statement Wall with Peel-and-Stick Wallpaper
Transform your walls into a canvas of creativity with peel-and-stick wallpaper. This DIY solution offers an easy way to add personality and charm to any space. Whether you’re aiming for a bold look or subtle elegance, removable wallpaper provides endless possibilities.

Selecting the Right Pattern
Choosing the perfect pattern is key to achieving the desired style. For small rooms, opt for scaled-down designs that don’t overwhelm the space. Bold floral patterns, like the glam gold-and-floral combination, create a striking focal point.
Consider the color scheme of your room. Geometric patterns add a modern touch, while botanical designs bring a natural vibe. Always test samples to see how the pattern looks in different lighting.
- Vinyl vs. Fabric-Backed: Vinyl is durable and easy to clean, while fabric-backed options offer a luxurious feel.
- Pattern Scaling: Smaller patterns work best in compact areas.
- Coordinating Elements: Match towels or curtains for a cohesive look.
Application Tips for a Flawless Finish
Proper preparation ensures a smooth application. Clean the walls thoroughly and sand textured surfaces for better adhesion. Use a level to align the first strip perfectly.
Place seams behind fixtures to hide imperfections. Smooth out air bubbles with a squeegee, starting from the center and moving outward. For high-humidity areas, choose moisture-resistant options to prevent peeling.
| Type | Cost | Best Use |
|---|---|---|
| Vinyl | $35/roll | High-traffic areas |
| Fabric-Backed | $200/roll | Luxury spaces |
With these tips, you can create a statement wall that transforms your home and leaves a lasting impact.
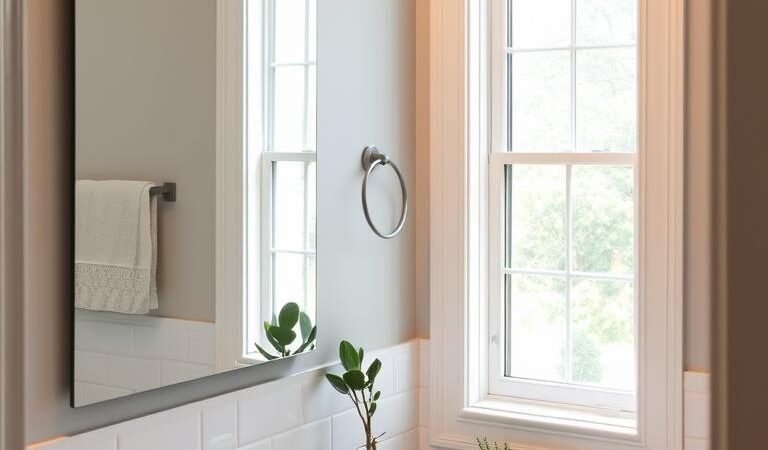
5. Upgrade Your Mirror for a Luxurious Touch
A well-chosen mirror can redefine the entire aesthetic of a room. It’s not just a functional piece—it’s a design element that adds depth, light, and elegance. Whether you’re aiming for a modern look or a classic vibe, upgrading your mirror is a simple yet impactful way to elevate your space.

Choosing the Right Size and Style
Proportion is key when selecting a mirror. A good rule of thumb is to match the mirror’s width to your vanity. This creates balance and harmony in the space. For a bold statement, consider oversized mirrors, but avoid them in rental units where they might overwhelm the room.
Style matters too. Arched shapes add a farmhouse charm, while sleek, frameless designs suit modern homes. Black-framed mirrors paired with chrome hardware create a striking contrast, as seen in renovation projects. For a touch of luxury, gilded mirrors over vanities bring timeless elegance.
DIY Mirror Framing Ideas
Framing a mirror is a fun and affordable DIY project. Start by selecting molding types—wood or PVC trim works well. Use adhesives and caulking to secure the frame, ensuring a seamless finish. For a polished look, paint the frame in a color that complements your decor.
Lighting can enhance your mirror’s appeal. Compare LED border lighting to traditional options—LEDs offer energy efficiency and a modern touch. Apply an anti-fog coating for practicality, especially in humid areas. Clean your mirror regularly with a vinegar solution to maintain its shine.
| Mirror Type | Best Use | Cost |
|---|---|---|
| Frameless | Modern spaces | $50-$100 |
| Arched | Farmhouse style | $75-$150 |
| Gilded | Luxury bathrooms | $100-$200 |
With these tips, you can transform your mirror into a focal point that enhances your home’s aesthetic. Whether you’re framing an existing mirror or installing a new one, these ideas ensure a luxurious touch every time.
6. Enhance Your Bathroom Lighting
Lighting can redefine the mood and functionality of any room. Whether you’re aiming for a cozy retreat or a bright, energetic space, the right setup makes all the difference. Upgrading your lighting is a simple yet impactful way to enhance your home’s ambiance and practicality.

Replacing Outdated Fixtures
Start by assessing your current fixtures. Outdated designs can make a space feel dull and uninspired. Replace them with modern options that match your style. Sparkly glass fixtures, for example, add a touch of elegance and reflect light beautifully.
Here’s a quick guide to replacing fixtures:
- Turn off the power at the circuit breaker.
- Remove the old fixture carefully.
- Connect the new fixture’s wires, matching colors.
- Secure the fixture to the ceiling or wall.
- Turn the power back on and test the light.
- Adjust the positioning for optimal illumination.
For a dramatic transformation, consider swapping a bulkhead for a chandelier. This upgrade can elevate the entire room’s aesthetic.
Adding Dimmer Switches for Ambiance
Dimmer switches are a game-changer for creating the perfect ambiance. They allow you to adjust the brightness to suit different activities, from bright task lighting to soft, relaxing glows. Ensure your fixtures are compatible with dimmers before installation.
LED strip lighting under vanities is another excellent option. It provides subtle illumination and adds a modern touch. Choose color temperatures wisely—2700K for warm, cozy light and 4000K for a crisp, bright look.
Safety is crucial when working with electrical components. Always follow manufacturer instructions and consult a professional if needed. Avoid non-IP rated fixtures near showers to prevent damage.
| Option | Cost | Best Use |
|---|---|---|
| Basic Fixture | $25-$50 | Simple upgrades |
| Chandelier | $150-$400 | Statement pieces |
| LED Strips | $30-$100 | Modern accents |
With these tips, you can transform your lighting setup and create a space that feels both functional and inviting. Whether you’re tackling a DIY project or hiring a professional, thoughtful lighting choices make a lasting impact.
7. Revamp Your Tile with Paint or Accents
Revitalizing your tile can bring a fresh perspective to your space. Whether you’re working with outdated designs or simply want a new look, there are creative and affordable ways to achieve stunning results. From painting over old tiles to adding accent pieces, these methods can transform your home without the need for a full renovation.

Painting Over Old Tile
Painting is a cost-effective DIY solution for updating tired tiles. Start by comparing epoxy and specialty tile paints. Epoxy offers durability, while specialty paints provide a smoother finish. Proper surface preparation is key—clean glossy tiles thoroughly and sand them for better adhesion.
Use a grout refresh pen to restore the lines between tiles, creating a polished look. For rentals, consider removable decals or stenciling techniques to add patterns without permanent changes. Avoid painting high-traffic floor tiles, as they may not hold up well over time.
Maintenance is simple—clean painted surfaces with mild soap and water. Pair your updated tiles with complementary bath mats for a cohesive design. This approach costs around $50, compared to $1500 for retiling.
Adding Accent Tiles for Visual Interest
Accent tiles are a fantastic way to inject personality into your space. Source 1’s black accent tile band is a great example of how a small change can make a big impact. Choose a color or pattern that contrasts with your existing tiles for a striking effect.
Here’s a quick comparison of tile paint options:
| Type | Cost | Best Use |
|---|---|---|
| Epoxy Paint | $30 | High-durability areas |
| Specialty Tile Paint | $20 | Smooth finishes |
For a cohesive look, coordinate accent tiles with other elements in the room. This approach is perfect for adding visual interest without overwhelming the space.
8. Maximize Storage with Creative Solutions
Clever storage solutions can transform even the smallest areas into functional and stylish spaces. Whether you’re working with a compact room or simply want to declutter, these ideas offer practical ways to organize while enhancing your home’s aesthetic.

Adding Floating Shelves
Floating shelves are a versatile and stylish way to maximize vertical space. They’re perfect for displaying decor, storing everyday items, or keeping essentials within reach. Mounting shelves on tile walls requires a few extra steps but is entirely achievable with the right tools.
Here’s a quick guide to installing floating shelves:
- Mark the desired height and use a level to ensure accuracy.
- Drill pilot holes into the tile using a masonry bit.
- Insert wall anchors to secure the brackets.
- Attach the shelf to the brackets and tighten screws.
For a cohesive look, pair open shelves with decorative baskets or bins. Avoid overloading shelves to maintain both safety and visual appeal.
Repurposing Furniture for Storage
Repurposing furniture is a creative way to add storage without buying new pieces. For example, an old nightstand can be transformed into a stylish vanity with a fresh coat of paint and new hardware. Flea market finds, like vintage crates or cabinets, can also be upcycled into unique storage solutions.
When repurposing wood furniture for humid areas, moisture-proofing is essential. Apply a sealant to protect against warping or damage. Tension rod towel racks are another budget-friendly option, offering flexibility and ease of installation.
| Storage Solution | Cost | Best Use |
|---|---|---|
| Floating Shelves | $20-$50 | Vertical storage |
| Repurposed Furniture | $10-$30 | Unique, custom storage |
| Tension Rod Racks | $10-$15 | Flexible towel storage |
For shared spaces, labeling bins or baskets can help keep items organized. Over-toilet ladder shelves are another excellent option, providing extra storage without taking up floor space. With these ideas, you can create a clutter-free, stylish home that feels both functional and inviting.
9. Replace Old Hardware for a Polished Look
Swapping out old hardware is a simple yet transformative way to refresh your space. Whether it’s cabinet handles, towel bars, or hooks, these small changes can create a cohesive and modern look. With a few DIY tools and the right choices, you can elevate your home’s aesthetic in no time.
Choosing Modern Cabinet Handles
Cabinet handles are more than just functional—they’re a key element of your style. Start by comparing finishes like brushed nickel and matte black. Brushed nickel offers a timeless appeal, while matte black adds a contemporary edge. For a unified look, consider matching all hardware in the same finish.
Use a template to ensure consistent spacing when installing new handles. This DIY trick guarantees a professional result. If you’re updating existing hardware, fill old screw holes with wood filler for a seamless finish. Chrome fixtures, like those from Source 2, provide durability and a sleek appearance.
Updating Towel Bars and Hooks
Towel bars and hooks are both practical and decorative. Opt for weighted towel bars to prevent sagging over time. Statement hooks, like those with unique designs, can double as art elements. Avoid mixing metal finishes—stick to one for a cohesive look.
Coordinate towel bars with toilet paper holders for a unified suite style. If drawers or cabinets feel sticky, apply a lubricant to the tracks for smooth operation. Here’s a quick comparison of trending pull styles:
| Finish | Style | Best Use |
|---|---|---|
| Brushed Nickel | Timeless | Traditional spaces |
| Matte Black | Modern | Contemporary designs |
| Chrome | Sleek | High-traffic areas |
For more ideas on how to modernize the space, explore these expert tips. With thoughtful hardware choices, you can create a polished and inviting home.
10. Add a New Shower Curtain for Instant Style
A new shower curtain can instantly refresh your space with minimal effort. It’s one of the simplest ways to introduce a fresh look and add personality to your home. Whether you prefer bold patterns or subtle designs, the right curtain can transform your shower area into a stylish focal point.

Selecting the Right Fabric
Choosing the right fabric is key to both style and functionality. PEVA and polyester are popular options. PEVA is eco-friendly and lightweight, while polyester offers durability and a wide range of color choices. Avoid mold-prone materials like cotton in humid areas.
For a custom look, consider Spoonflower curtains. These allow you to choose unique patterns and lengths. If you’re working with store-bought curtains, hemming them to fit your space is a simple DIY solution. Grommet tops are modern and easy to install, while buttonhole tops add a classic touch.
DIY Shower Curtain Ideas
Get creative with your shower curtain for a personalized style. Stenciling plain curtains is a fun project that adds a unique touch. For a layered look, try double curtains—one for privacy and another for decoration. No-sew alternatives, like fabric panels with a liner, are perfect for renters.
Upgrade your curtain rings for a polished finish. Chrome or brushed nickel options add a sleek look. For thematic patterns, choose designs that match your home’s aesthetic. Geometric prints work well in modern spaces, while floral patterns add a soft, inviting feel.
11. Install Beadboard for a Classic Touch
Beadboard adds timeless charm to any room, blending elegance with practicality. This versatile material can transform your walls, creating a fresh and inviting atmosphere. Whether you’re aiming for a farmhouse vibe or a modern twist, beadboard is a simple yet impactful way to enhance your home.

DIY Beadboard Installation Tips
Installing beadboard is a manageable DIY project with the right tools and techniques. Start by comparing MDF and PVC options. MDF is affordable but less moisture-resistant, while PVC is durable and ideal for humid areas like the bathroom. Source 1’s $20 4×8 panels are a cost-effective choice for beginners.
Measure your space carefully and cut panels to fit, especially around plumbing fixtures. Use a level to ensure straight lines and secure panels with adhesive and nails. Caulk the seams for a seamless look. Adding a chair rail cap not only enhances the design but also protects the beadboard from wear over time.
Painting Beadboard for a Fresh Look
Painting beadboard is a great way to customize its appearance. Choose a semi-gloss finish for durability and easy cleaning. Two-tone treatments, like white panels with a contrasting color above, add visual interest. Always prime the surface before painting to ensure even coverage.
For a cohesive design, match the beadboard to other elements in the room. Avoid moisture penetration by sealing edges and joints. If dents occur, use wood filler and sand the area before repainting. These simple steps ensure your beadboard remains a stunning feature for years to come.
| Type | Cost | Best Use |
|---|---|---|
| MDF | $20/panel | Dry areas |
| PVC | $30/panel | Humid spaces |
12. Update Your Countertop on a Budget
Updating your countertop can breathe new life into your space without breaking the bank. Whether you’re looking for a modern look or a classic vibe, there are plenty of options to suit your style. From laminate to remnant granite, these ideas offer a cost-effective way to transform your home.

Using Laminate or Remnant Granite
Laminate countertops are a popular choice for their affordability and versatility. They come in a wide range of colors and patterns, making it easy to find a design that complements your space. For a more luxurious look, consider remnant granite. These pieces are often available at a fraction of the cost and can add a high-end touch to your home.
Here’s a quick comparison of the two:
| Type | Cost | Best Use |
|---|---|---|
| Laminate | $20-$50/sq ft | Budget-friendly projects |
| Remnant Granite | $40-$100/sq ft | Luxury upgrades |
When measuring for remnants, ensure accurate dimensions to avoid waste. Source 2’s $60 Restore find is a great example of how affordable granite can be.
Refinishing Your Existing Countertop
Refinishing is a fantastic DIY option for those who want to update their countertop without replacing it. Concrete overlays and epoxy finishes are two popular methods. Concrete overlays provide a modern, industrial look, while epoxy finishes offer durability and a glossy finish.
Follow these steps for a successful refinishing project:
- Clean the surface thoroughly to remove dirt and grease.
- Sand the countertop to create a smooth base for the new finish.
- Apply the chosen product, following manufacturer instructions.
- Allow ample drying time before using the countertop.
For a faux marble effect, try painting techniques that mimic natural stone. Avoid using hot tools on laminates, as they can damage the surface. Edge profile upgrades, like bullnose or beveled edges, add a polished finish to your countertop.
Daily maintenance is simple—wipe down the surface with a mild cleaner to keep it looking fresh. With these tips, you can achieve a stunning countertop transformation that enhances your home’s aesthetic.
13. Incorporate Vintage Finds for Unique Charm
Vintage finds bring character and history into any space, creating a unique charm. These timeless pieces add depth and personality to your home, blending seamlessly with modern designs. Whether you’re hunting for affordable treasures or repurposing antique furniture, there’s a way to make vintage work for your style.

Finding Affordable Vintage Pieces
Start by mapping local salvage yard hotspots and flea markets. These places often hide gems like a converted flea market console or an Asian butcher table turned vanity. Facebook Marketplace alerts can also lead to great finds at unbeatable prices.
When shopping, look for pieces with solid construction and unique details. Avoid items with lead paint or significant damage. Here are five signature vintage items to consider:
- Mid-century dressers for sink cutouts
- Antique tables with rich wood tones
- Vintage mirrors with ornate frames
- Repurposed cabinets for storage
- Industrial carts for a modern twist
Repurposing Antique Furniture
Repurposing antique furniture is a rewarding DIY project. For example, a dresser can be transformed into a vanity by cutting out space for a sink. Sealing techniques for wood, like polyurethane coatings, protect against moisture and ensure longevity.
Hardware restoration methods, such as polishing or replacing handles, can revive old pieces. Mixing eras, like pairing a Victorian mirror with a modern vanity, creates an eclectic look. Always apply moisture barrier solutions to protect vintage wood in humid areas.
With creativity and care, vintage finds can become the centerpiece of your home, adding a timeless charm that’s uniquely yours.
14. Add Greenery for a Fresh, Natural Feel
Bringing nature indoors can instantly refresh your space with life and energy. Plants not only enhance the aesthetic but also improve air quality and create a calming atmosphere. Whether you’re a seasoned plant parent or a beginner, there’s a way to incorporate greenery into your home that suits your style.

Choosing Low-Maintenance Plants
For those with a busy schedule, low-maintenance plants are the perfect solution. Air plants and succulents are excellent choices—they require minimal care and thrive in various conditions. Air plants, for example, need only occasional misting, while succulents store water in their leaves, making them drought-tolerant.
If you’re looking for humidity-loving species, consider ferns or peace lilies. These plants thrive in moist environments and add lushness to your space. For a DIY project, create a macrame hanger to display your plants, adding a bohemian touch to your decor.
Styling Plants in Small Spaces
Even in compact areas, greenery can make a big impact. Vertical gardens are a creative way to maximize space. Use wall-mounted planters or shelves to arrange your plants without cluttering the floor. Source 1’s shower bomb display is a great example of how to incorporate plants into functional items.
For a cohesive look, group plants of varying heights and textures. Apothecary jars filled with bath salts or pebble tile “rugs” can complement your greenery, adding a natural vibe to your bathroom. Avoid toxic plant varieties like philodendrons if you have pets or children.
- Self-watering systems: Ideal for busy plant owners.
- Fake plants: Opt for high-quality options for a realistic look.
- Aromatic herbs: Add fragrance and functionality.
With these tips, you can transform your home into a green oasis that feels fresh and inviting.
15. Create a Spa-Like Atmosphere with Accessories
Transform your space into a tranquil retreat with thoughtful accessories. Small touches can bring luxury and relaxation to your home, turning it into a calming sanctuary. From soothing scents to plush textiles, these elements work together to create a spa-like experience.

Adding Candles and Diffusers
Essential oil diffusers and candles are perfect for setting a relaxing mood. Compare blends like lavender for calmness or eucalyptus for invigoration. Thrifted glass jars, as seen in Source 2, can be repurposed into stylish diffusers.
When using candles, opt for flameless LED options to avoid open flames. Sensory layering principles suggest combining scents with soft lighting for a complete experience. Place candles on non-slip surfaces for safety.
Using Soft Textiles for Comfort
Soft textiles like plush towels and Turkish cotton bath sheets add a touch of luxury. Source 1’s plush towels are a great example of how to elevate your bathroom’s style. Heated towel racks provide warmth and convenience, making them a practical addition.
For a cohesive look, fold towels neatly or use apothecary jars for organization. Non-slip rug pads ensure safety while adding comfort underfoot. Incorporate earthy tones and natural materials for a cozy vibe.
For more ideas on creating a serene sanctuary, explore these budget-friendly decor tips. With these accessories, you can turn your home into a spa-like retreat that feels both luxurious and inviting.
16. Conclusion: Achieving a Luxurious Bathroom on a Budget
Creating a luxurious space doesn’t require a complete overhaul—small, thoughtful changes can work wonders. Start with high-impact updates like fresh paint, modern hardware, or peel-and-stick wallpaper. These DIY projects cost under $50 but deliver impressive results.
Layering these upgrades creates a cumulative effect, transforming your home into a cohesive, stylish retreat. For example, pairing a new mirror with updated lighting can elevate the entire room. A phased approach makes the process manageable and budget-friendly.
Personal style is key. Choose accessories and finishes that reflect your taste, but avoid over-customization if resale is a concern. Seasonal rotations, like swapping out textiles or decor, keep the space fresh and inviting.
Maintenance is simple. Regular cleaning and minor touch-ups ensure your upgrades stay stunning. With creativity and care, you can achieve a luxurious feel without breaking the bank.