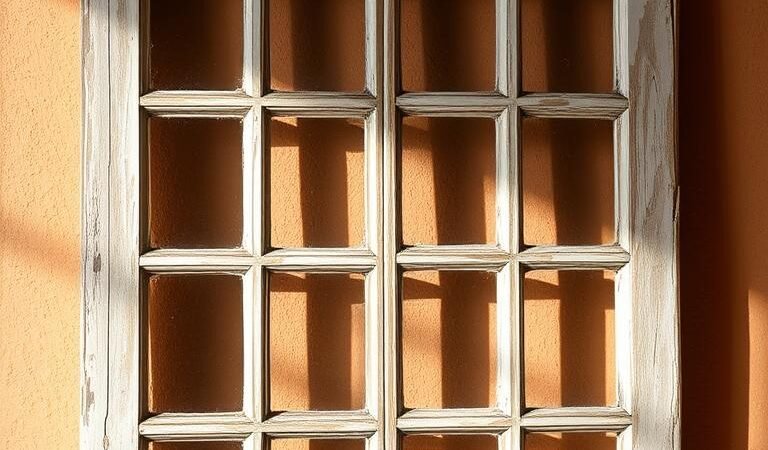
Breathing new life into discarded materials can transform your home decor with charm and creativity. One standout idea? Turning salvaged window panes into eye-catching displays for photos or artwork. These pieces add instant character to walls, mantels, or hallways—blending nostalgia with modern style.
A neighbor’s unwanted windows became the star of a recent DIY project. With $5 engineer prints from office supply stores, the multi-pane frames now showcase oversized black-and-white images. The result? A striking focal point that cost less than a latte.
This approach isn’t just budget-friendly—it’s versatile. Paint the frames for a pop of color, swap seasonal artwork, or mix family photos with vintage postcards. Each pane offers a mini canvas, letting you tell visual stories in clusters. For step-by-step guidance, explore this distressed frame tutorial to start your own project.
Key Takeaways
- Upcycled window frames add rustic charm as photo or art displays.
- Engineer prints from stores like Office Max cost under $5 for large images.
- Multi-pane designs create dynamic gallery walls with minimal effort.
- Customize with paint or seasonal swaps for year-round versatility.
- Salvaged materials make projects eco-friendly and affordable.
Why Turn Old Window Frames into Rustic Picture Frames?
Upcycling isn’t just trendy—it’s a gateway to personalized, eco-conscious design. Repurposed materials like weathered panes add character while reducing waste. Each scratch and chip whispers stories, turning functional pieces into conversation starters.

The Charm of Upcycled Home Decor
Vintage glass imperfections and distressed wood create timeless appeal. Unlike mass-produced frames, these pieces feel curated—like heirlooms in the making. A kitchen rebuild project proved salvaged materials could anchor a room’s aesthetic while slashing costs.
Rotate artwork seasonally or use panes as dry-erase boards for memos. The flexibility lets you refresh your space without new purchases.
Cost-Effective and Eco-Friendly DIY
Compare prices: new gallery frames ($20+) vs. free salvaged panes plus $10 supplies. Beyond savings, you’re diverting demolition waste from landfills. One family’s generational photo collage transformed attic finds into a wall of memories.
- Budget-friendly: Engineer prints fit panes perfectly for under $5.
- Planet-positive: Reusing materials cuts carbon footprints.
- Emotional value: Handmade displays outlast store-bought alternatives.
Gathering Your Materials and Preparing the Window Frame
Every great DIY project starts with the right materials—let’s gather yours. Whether salvaged from a barn or a flea market, weathered panes need love before they shine. A little prep ensures your frame becomes a flawless backdrop for memories.

Essential Supplies: Cleaning Tools and Prints
First, assemble these items:
- Metal scraper for stubborn grime (45° angle protects glass)
- Vacuum with brush attachment to lift dust from crevices
- Sawtooth hangers or 2″ magnets for interchangeable art
- Mod Podge to secure delicate prints
Pro tip: A hair dryer speeds up drying tacky paint layers between coats.
Step-by-Step Cleaning and Prepping
Start by vacuuming loose dirt from the frame’s grooves. For sticky residue, a maple syrup acrylic wash softens grime without damaging weathered wood. Scrape gently—each scratch adds character, but you want control over the distress.
Follow this DIY window frame tutorial for glass preservation tricks. Pre-drill holes now if hanging later.
Choosing the Right Size and Type of Images
Measure each pane, then order prints 10% larger for cropping flexibility. Matte paper reduces glare, while engineer prints (like Office Max’s $5 sheets) fit multi-pane designs perfectly.
For seasonal swaps, use clear magnets to hold lightweight art. Mix family photos with vintage maps for a layered story.
Step-by-Step Guide to Creating Your Rustic Picture Frame
Transform salvaged materials into stunning decor with this hands-on guide. Whether you’re a DIY novice or a seasoned crafter, these steps ensure a polished result. From cleaning to hanging, each phase builds toward a showstopping display.

Cleaning and Prepping the Frame
Start by removing dirt and grime. A soft brush and mild soap work for light buildup. For stubborn residue, try a diluted vinegar solution—it’s gentle on weathered wood.
Distress the frame for extra character. Use a chain or sandpaper to create natural-looking wear. Wipe with a brown acrylic wash to highlight grooves.
Printing and Attaching Your Images
Choose high-resolution photos (300 DPI minimum) for crisp prints. Engineer prints are affordable and fit multi-pane designs perfectly.
- Trim prints slightly larger than the glass for seamless edges.
- Secure with Mod Podge or clear magnets for interchangeable art.
Hanging or Displaying Your Finished Frame
Distribute weight evenly for multi-pane displays. Use 2″ neodymium magnets spaced 4″ apart for stability. Renters can opt for museum putty—no nails needed.
| Mounting Method | Best For | Weight Limit |
|---|---|---|
| Sawtooth hangers | Permanent displays | Up to 10 lbs |
| Magnetic strips | Interchangeable art | Up to 5 lbs |
Finish with a UV-resistant sealant to protect photos from fading. Now, step back and admire your handiwork—a timeless piece that tells your story.
Creative Variations and Customization Ideas
Customization turns simple projects into signature pieces that reflect your style. Whether you prefer a weathered vintage look or modern versatility, these ideas will inspire your next creation. Let’s explore techniques to make each frame uniquely yours.

Painting and Distressing Techniques for Vintage Charm
Chalk paint delivers instant character. Layer colors like “Colonial Red” and “French Linen,” then sand edges to reveal undertones. For a timeworn effect, rub vaseline on corners before painting—it resists coverage, mimicking natural wear.
Seal with matte wax to protect the finish. This technique works beautifully on wood, enhancing its grain. Pro tip: Use a dry brush to flick paint lightly for speckled texture.
Magnetic Magic: Interchangeable Artwork
Upcycle Claire’s-style magnetic earring backs into mini mounts. Glue them to panes for no-fuss art swaps. Seasonal displays shine with:
- Pressed autumn leaves under glass
- Winter silhouette cutouts on kraft paper
- Fabric swatches for mixed-media depth
Pair with lightweight photos or kids’ drawings laminated for durability. Silicone bumpers prevent glass scratches.
Multi-Pane Collages for Gallery Walls
Group frames of varied sizes for visual interest. Try a family timeline—baby photos in small panes, wedding shots in larger ones. Coordinate colors using Benjamin Moore’s Historical Collection, like “Van Deusen Blue” for cohesion.
| Collage Theme | Materials | Tips |
|---|---|---|
| Travel Memories | Vintage maps, ticket stubs | Use Mod Podge for decoupage |
| Botanical | Dried flowers, herb prints | UV glass prevents fading |
Arrange layouts on the floor first. Snap a photo to reference while hanging.
Conclusion
Give your space character with this easy, rewarding project. For under $20 and three hours of time, you’ll craft a one-of-a-kind piece that 98% of DIYers love. Mix vintage maps or fabric scraps for unexpected flair.
Host a swap meet to share materials with neighbors—community creativity sparks joy. Watch for trends like LED backlighting to elevate designs further.
Pro tip: Marine varnish shields outdoor displays like a cozy blanket. Now, snap your creation and tag #WindowFrameRevival. Let’s fill feeds with family memories and handmade art!